Have you ever wondered how your friend's profile photo on Facebook is uploaded in amazing quality and size, but somehow your HQ photo comes out as a pixelated, blocky image? Fear no more; I'm here to show you some tips on how to achieve a HQ profile photo!
Upload the best version of the intended profile picture - You will avoid additional image compression if you don't use an image already uploaded on the Internet.
If the photo you like has already been uploaded onto Facebook, download the image onto your desktop instead. You'll have a much better chance of image quality compared to selecting "Make Profile Picture". See the below image for reference.
After collecting the best version of your photo, upload the photo and follow these tricks!
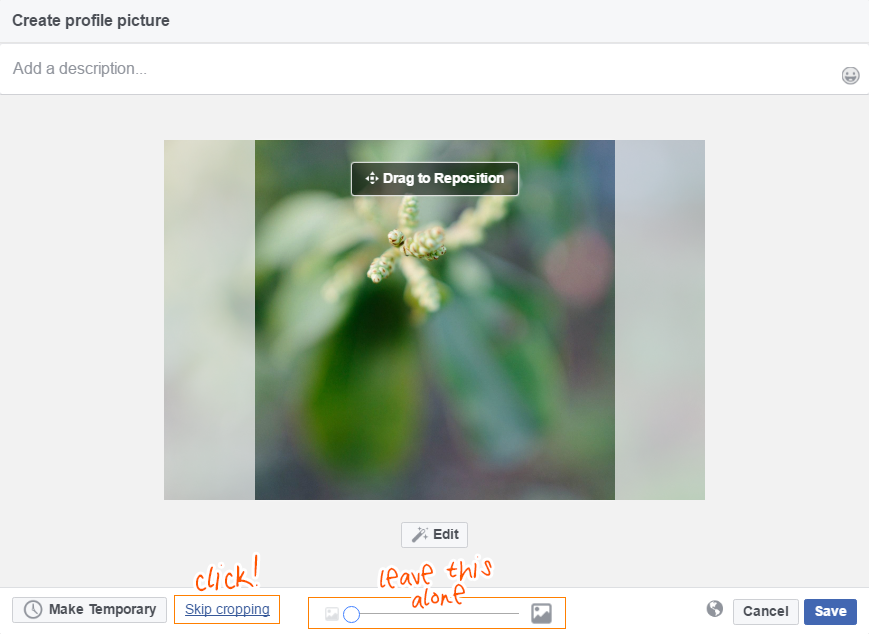
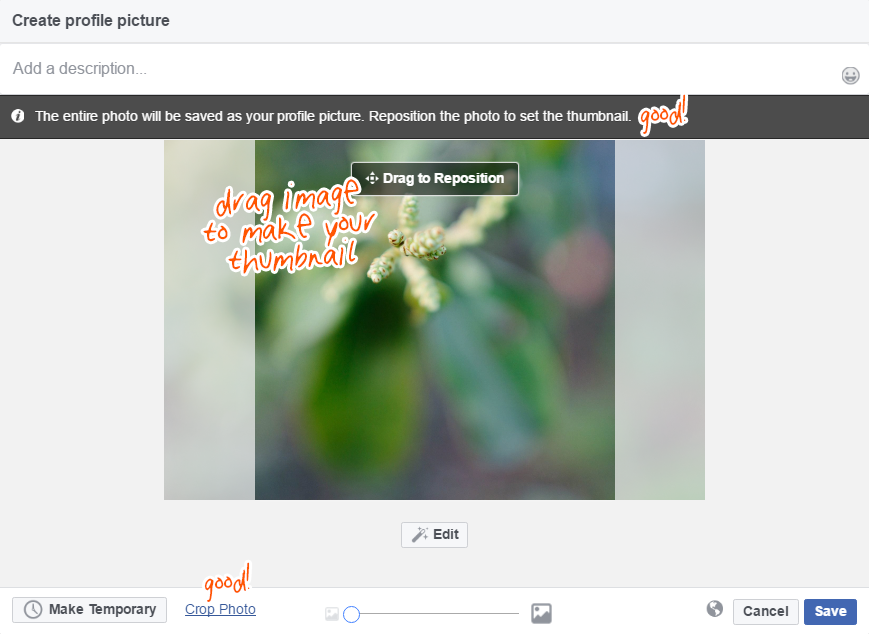
Click "Skip cropping" - By doing so, you will be uploading the entire photo, leaving the full resolution quality intact. You'll know that it's in full resolution when you see this text pop up:
The entire photo will be saved as your profile picture. Reposition the photo to set the thumbnail
Avoid zooming - Don't be tempted by the zoom toggler! It will ruin the image quality immediately.
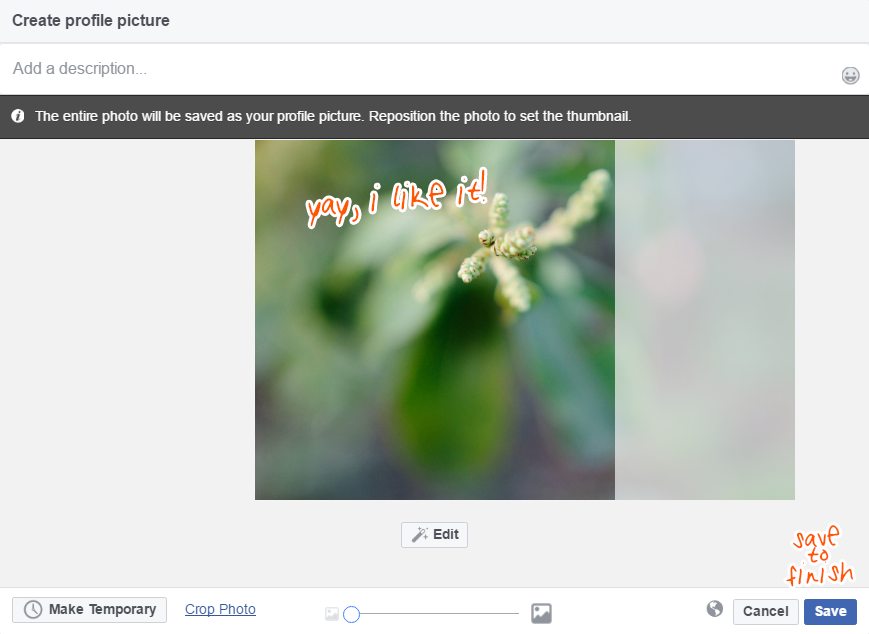
Create your thumbnail image - Drag the photo until you have your desired thumbnail image.
Click "Save" - Yay, you're done!


Last Updated for Facebook April 2017

